
Using Codex AI for UX/UI design isn't just possible — when paired with the right workflow, it's genuinely fast. The challenge is that Codex AI alone gives you raw output. iMini AI's multi-model canvas gives you the context to turn that output into real design work: compare, iterate, and produce — without switching tools.
What Codex AI Brings to UX/UI Design
Codex AI understands visual intent expressed in language. Describe an interface, a user flow, or a design direction — and Codex AI returns a concrete visual interpretation. It's strongest for: generating UI concepts from text prompts, visualizing screen layouts before opening Figma, producing design mood boards and direction references, and iterating on visual language quickly without pixel-level work. What it needs is a workflow that structures that raw power into professional output.
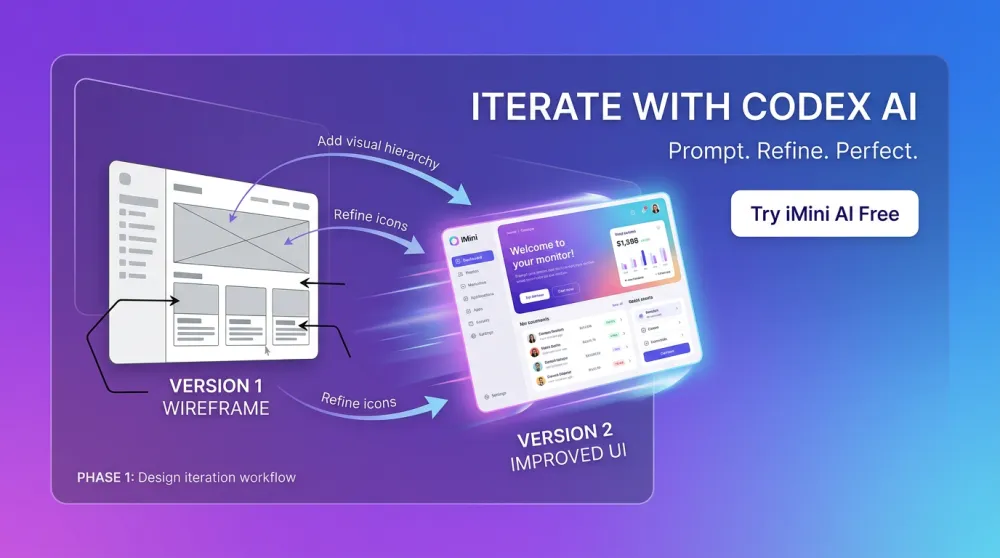
Step 1: Generate UI Wireframes and Screen Concepts
Start with Codex AI for rough screen concepts, not final design. The goal at this stage is to visualize options quickly — not to produce something Figma-ready. Use prompts that specify the screen type, user context, and hierarchy, not exact visual styling.
Mobile onboarding screen for [app type], step 2 of 4, [user goal at this step], clean minimal layout, primary CTA centered with supporting body text above, secondary option below, progress indicator at top, no distracting elements
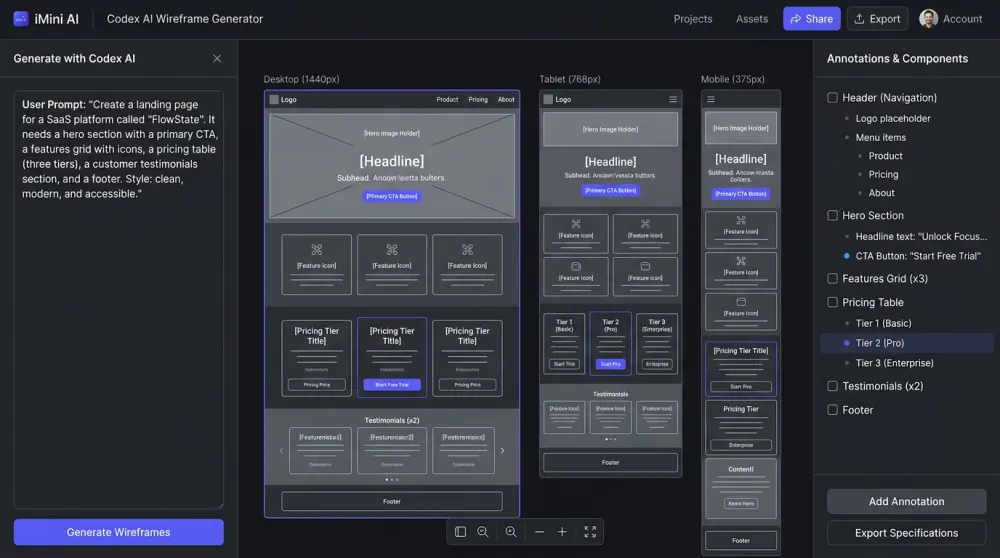
Generate 3-5 screen variants from the same brief. The variation isn't wasted — it's the fastest way to discover which layout direction resonates before committing to production.
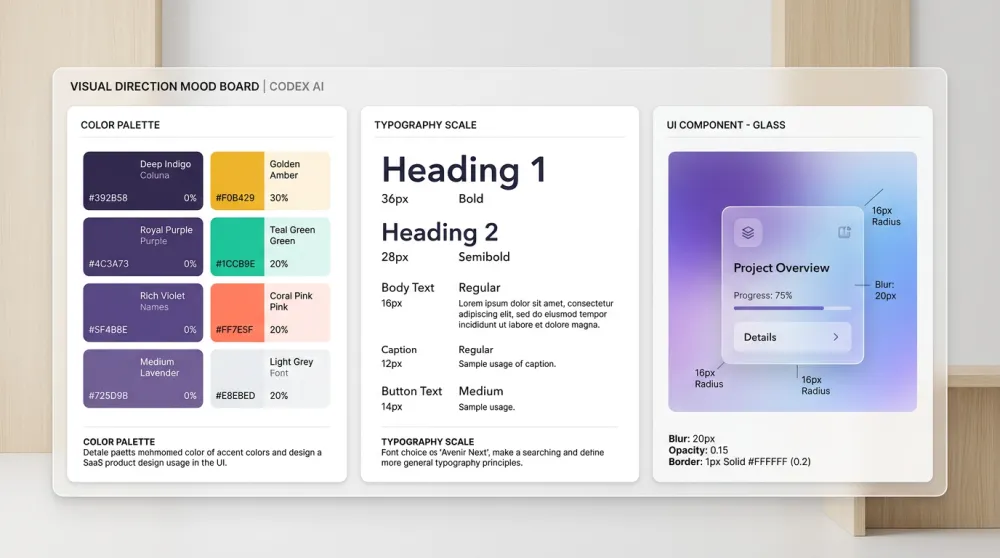
Step 2: Build Visual Design Direction with Mood Boards
Before touching color, typography, or components, use Codex AI + iMini AI to establish visual direction. A mood board built in iMini's canvas can pull references from multiple models simultaneously — giving you a broader starting point than any single source.
Design system mood board for [product type], color palette [mood adjectives: calm/bold/playful/professional], typography direction [display + body font feeling], UI material language [glass/flat/material/brutalist], 3-panel horizontal layout showing color, type scale, and component texture
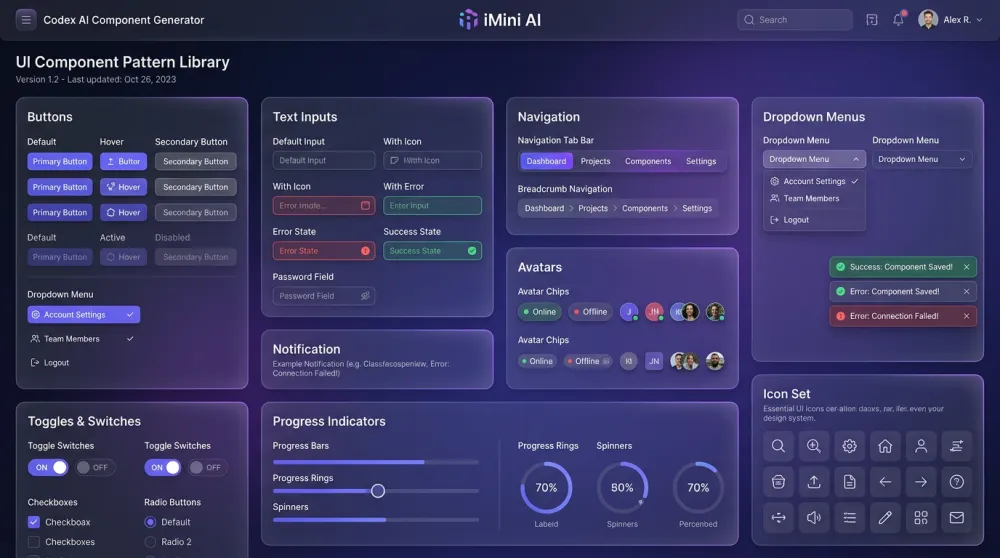
Step 3: Generate UI Component Libraries
Once visual direction is set, use Codex AI to generate component references — not as production-ready assets, but as visual specs your design system can be built from. Describe the component system, not individual components.
UI component library for [app category] in [design language: glassmorphism/flat/neumorphic], primary color [hex or description], button system with primary secondary and ghost states, input fields with label and error states, card component with shadow and border radius, dark mode version, clean grid layout
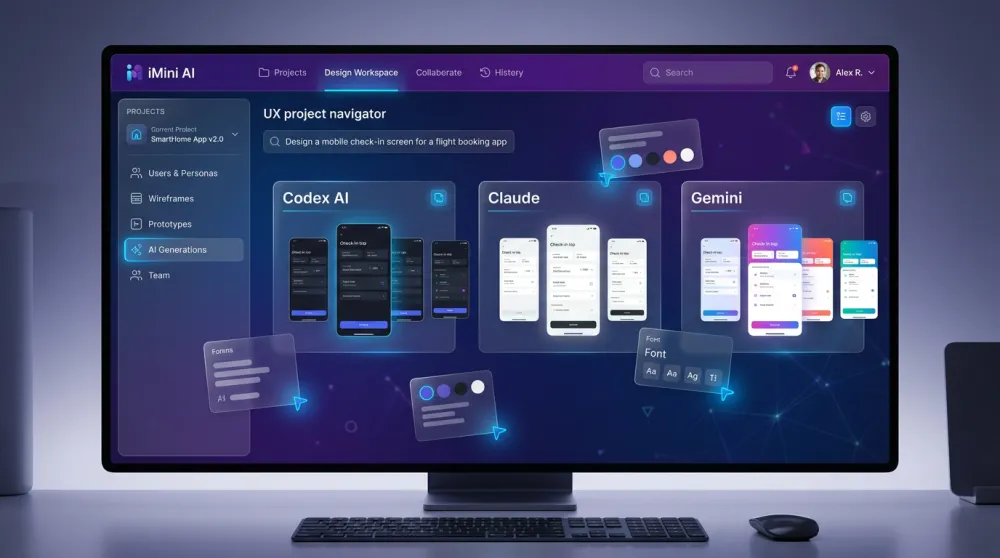
Step 4: Use iMini AI Multi-Model Canvas for Design Iteration
This is where iMini AI changes the UX design workflow. Instead of running a single Codex AI prompt and accepting or rejecting the result, you run the same design prompt through Codex AI, Claude, and Gemini simultaneously — then compare outputs side by side. Different models interpret visual intent differently. Seeing three interpretations of the same design brief in parallel reveals directions you wouldn't have found by sticking to one model.
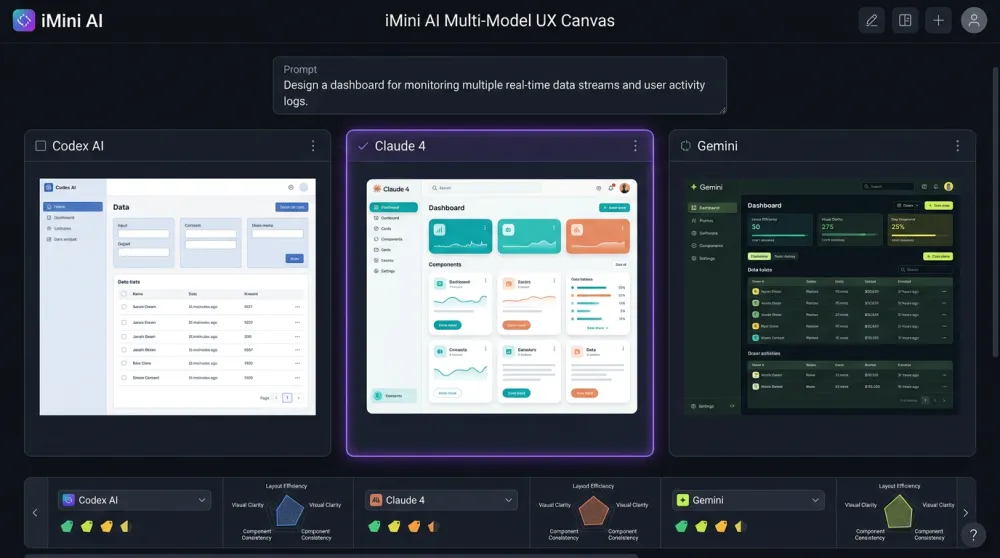
The comparison workflow also works for iteration: keep the best elements from each output and use them to refine your next prompt. Within three rounds, you typically have a visual direction strong enough to take into Figma.
Step 5: Iterate Fast, Lock Direction, Move to Production
The Codex AI + iMini AI workflow is front-loaded on exploration. The payoff is that when you open Figma, the design direction is already decided — you're executing a resolved concept, not still exploring. According to Nielsen Norman Group's research on design sprint efficiency, teams that resolve visual direction before entering production tools reduce revision cycles by 40–60%.
Use iMini AI's built-in image editing for final touchups — background removal, upscaling for presentation, style transfer to unify varied outputs — before the handoff to Figma. The entire exploration-to-handoff workflow stays in one tool.
About iMini AI
iMini AI is purpose-built for the way creative professionals actually use Codex AI for UX/UI design: not as a single-output tool, but as a multi-model exploration environment. The multi-model canvas runs Codex AI alongside Claude, Gemini, and other leading models simultaneously — so every design prompt reveals multiple directions at once, not just one.
Built-in image editing (background removal, upscaling, style transfer) takes raw AI output to presentation quality in the same workspace. For UX designers who want to use Codex AI seriously — not just generate one image and export — iMini AI is where the full design exploration workflow lives.
Five steps, one integrated workflow. Codex AI handles visual exploration; iMini AI's multi-model canvas handles comparison, iteration, and editing. The result: when you open Figma, the design direction is already decided — you're executing a resolved concept, not still searching for one.